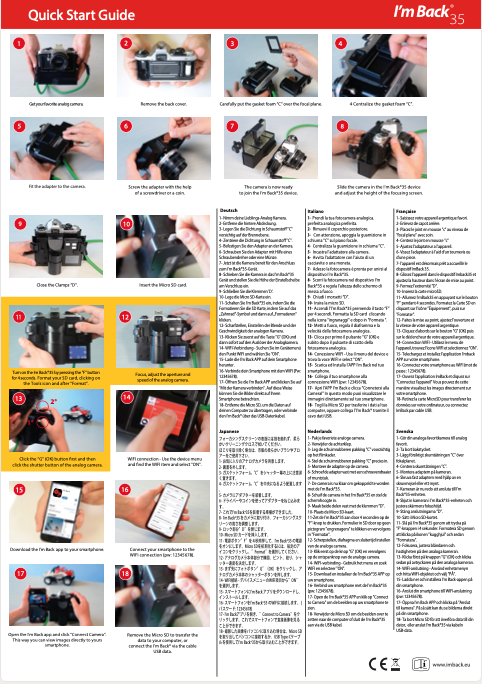
I’m Back35 use step by step…
A- After opening the box and having the device in hand, first of all, remove the battery and put it to charge.
B- Remove the Universal cover from The device by unclipping the edges of the clamps.
C- Remove “carefully” the protective film sticker on the front of the semi-transparent plastic (be careful when pulling the red tab. There is a protective film sticker that should be pulled off from the surface of the semi-transparent plastic, but If you notice that when you pull, the entire semi-transparent part comes off, you need to replace it back and then with your finger block it in its position. Try then to remove the protective film sticker with the help of a piece of simple adhesive tape, stick it on any edge and try to remove it. You will see that it comes off easier!)
D- Prepare your camera; remove the original cover by removing the blocking pin as follows: Remove the bottom of the camera by unscrewing the small screws with a god screwdriver, and be careful not to scratch the camera or damage the screws. After removing the screws, use a small metal or another rigid piece that can penetrate from the top and push the pin off. Now position the “squared light protection foam” at your camera shutter area and place the universal adapter over it and screw the adapter at the bottom of your camera with the screw that is included in your box.
Finally, adjust the adapter’s position so that the camera shutter hole is centered on the adapter, and also lightly press the universal adapter to your camera so that the rear foam avoids light or dust entrance. If the adapter is dedicated, it will be enough to mount it and fix the bottom screw.
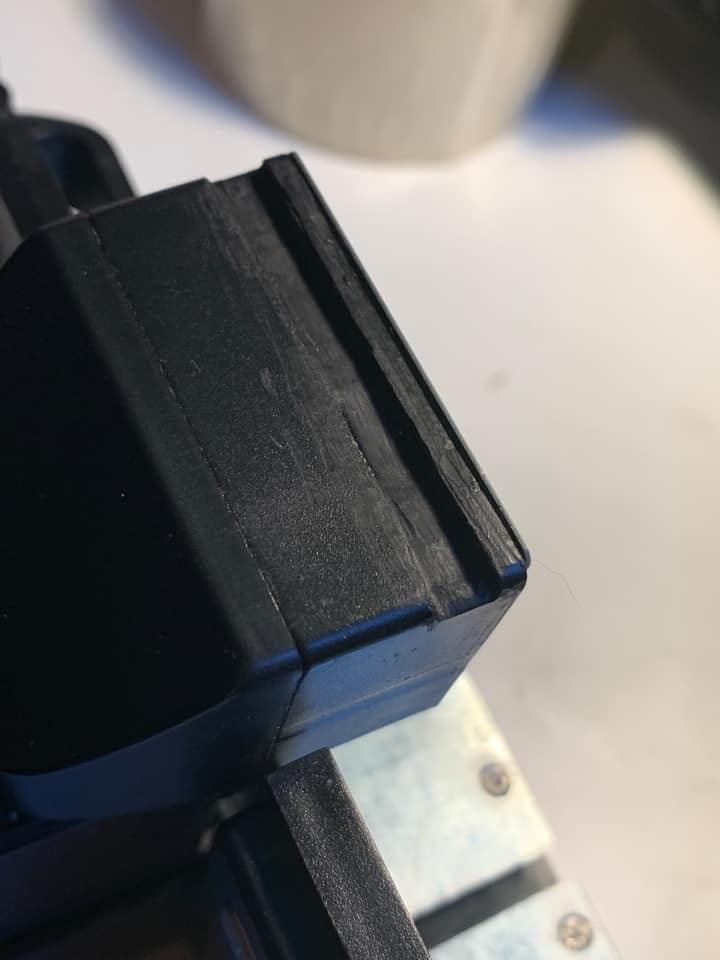
E- Adjust the “periscope” height (periscope is the part in which the focusing screen is placed) until it enters into the “squared light protection foam”. Finally slide your camera into the I’m Back35 device and lock the side clamps.
F- As soon as the battery is charged, put it back in its compartment. Now your analog camera is ready to take your first digital photo!
To take pictures or videos;
Well, first of all, if you have NOT read the manual that came in the box, and you have made changes to the I’m Back configuration in an attempt to take a picture but without success, I suggest that you return the I’m Back35 factory settings (by resetting the menu). Once this is done, use the left arrow and return to the home page. Important notes; To take pictures you must always be on the home page. If, for example, you exit the home page to view photos and then, without turning back to the home page, you try to take
a photo, the photo will not be taken. Always remember to leave the page you are viewing and always return to the home page, the one you see when you turn on I’m Back35 it always appears. To take a picture, as there is no connection between the electronics of the I’m Back35 and your old camera, this synchronization will be done manually every time.
1- put your camera in focus and adjust the speed shutter and aperture.
2- are you ready to take the picture? then place your thumb on the OK button and your index finger on the camera shutter button.
3- To take the picture, firstly with your thumb, click on the OK button and immediately on the shutter button (you have two seconds to click the shutter button on your camera after clicking the Ok button).
If you did exactly as I explained, click to review the image (play) and your image will be there. If not, return to the initial view by clicking on back, and selecting Camera. If after looking at the photos you eventually took and you do not return to the home screen, and you take photos while in the “view photos” function, your photo will not come out. Therefore, it is important to always be on the home screen to take pictures photos or videos
I'm Back35 - Answer the main questions:
SD CARD ERROR message when clicking any button? Format sd card.
Format the new SD card into the I’M BACK DEVICE. Do NOT use your computer for formatting.
How to take a photo in manual mode?
Why do some cameras not work if you remove the cover?
Attention Nikon F100, F4, F100, F90, F3 Olympus OM4 and others… To make the shutter work, please block the left (or right, depending on the model) pin with the help of a small piece of plastic. If they don’t, the camera will think it’s missing its cover and it won’t work.
Very hard focusing screen support. How to make it soft to move?
This problem was because the two metal parts are very close to the plastic. To unlock, do the following; 1 Without fear of breaking, move up and down a few times until it feels soft. 2 Wipe away any black plastic that may have come off and snap your I’m Back into the desired position. Don’t worry about moving it, it won’t break.
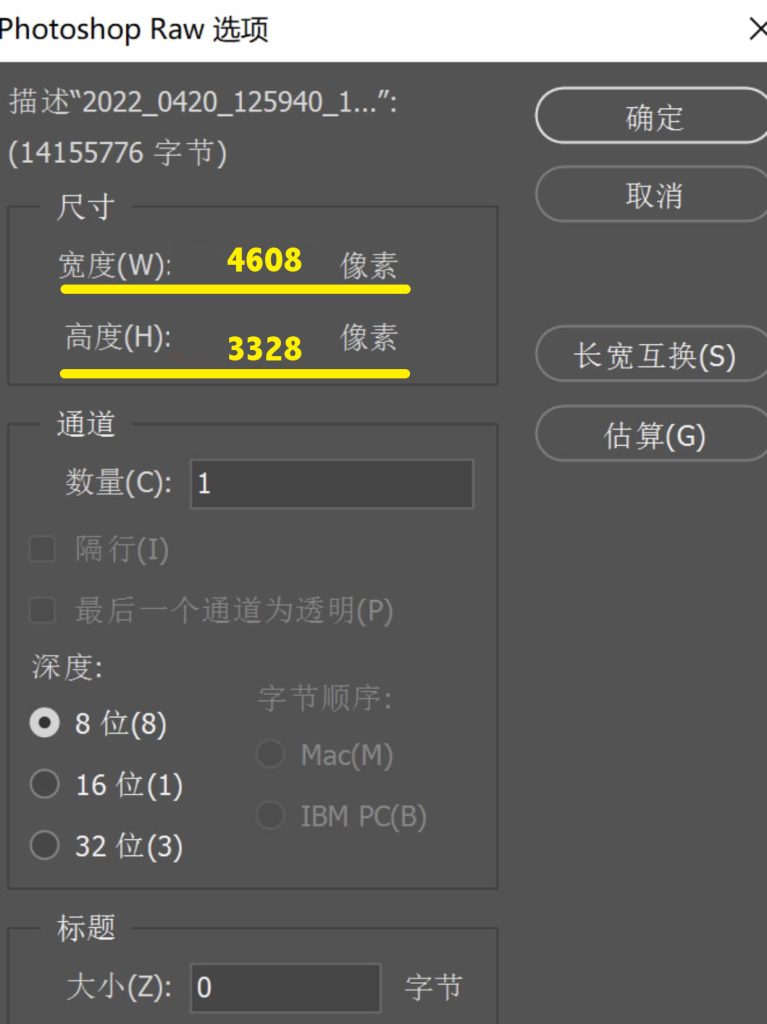
RAW photos not opening in I’m Back?
You can make facts and save in 4 different modes;
1- color JPEG
2- Black and withe JPEG
3- Sepia JPEG
4- RAW
RAW – Pay attention; the pictures saved isn’t possible open into your device, because the file is too big. For this, open in your photoshop. Important; put this parameters for file dimensions;W 4608 x h 3328 (for I’m Back 35)
.RAW to .DNG:
DNG Converter transforms I’m Back35 and MF RAW files into DNG (Adobe Digital Negative). DNG files can be imported and processed in a clean room with all software products such as Camera Raw of Photoshop (but also free or free such as RawTherapee, Krita, Darktable, or ART) to demosaise the file produced by the sensor with the algorithms in use programs, adjust the colors and improve the image before moving on to post-production (remaining on the subject of free software, Gimp, Krita, etc.).
For upload you RAW filke and transform in DNG file click here:
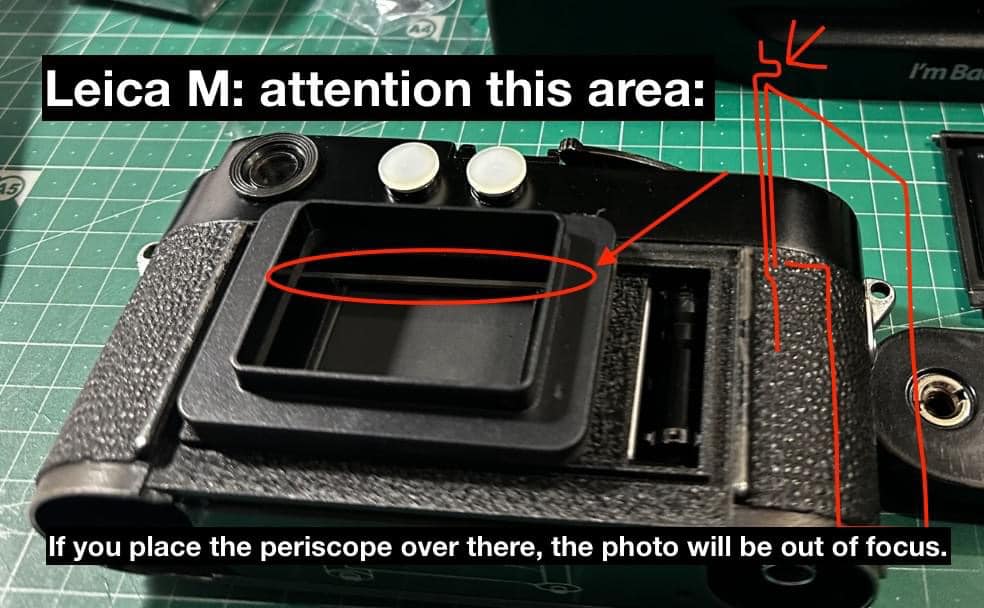
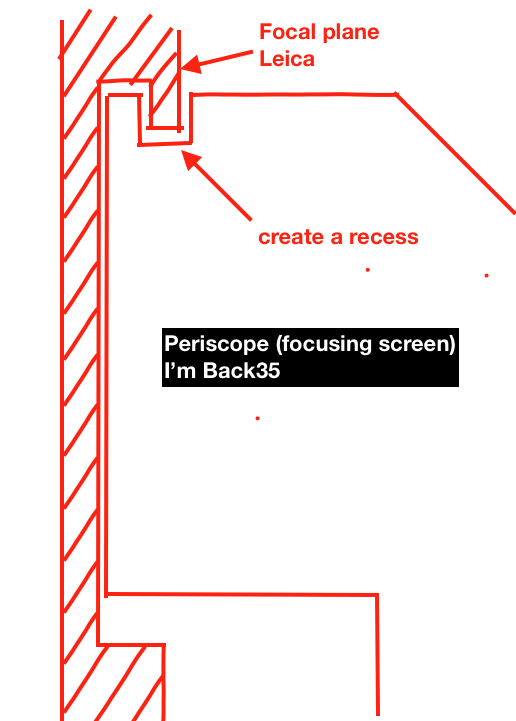
Check correct focusing and correct position for Leica M
The ISO adjust function works in AUTOMATIC mode only.
ISO 100
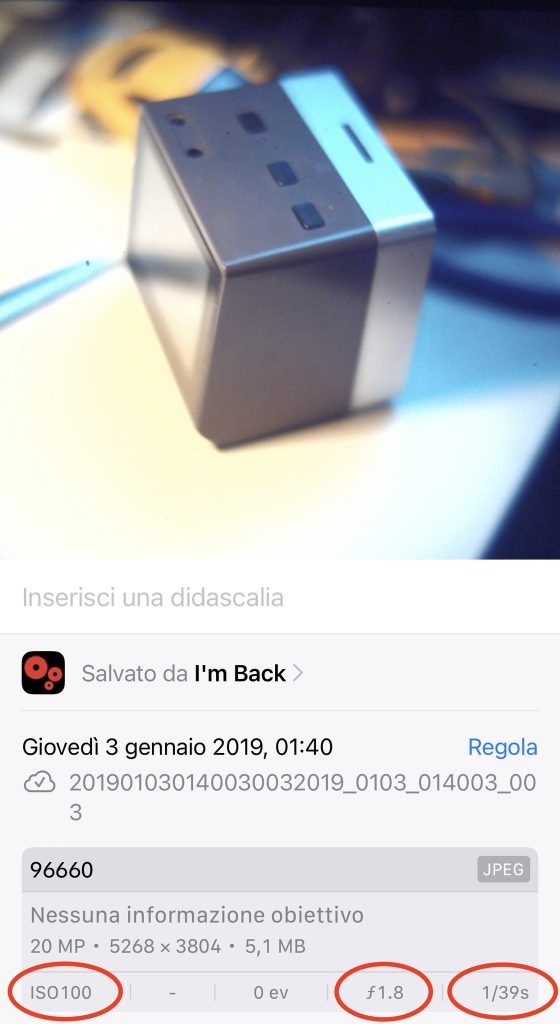
ISO 1600