I’m Back film use step by step…wait...
I'm Back Setup and User Guide

Receiving the Product
When you receive the package, follow these steps:
- Remove the safety stickers:
- The package is sealed with two stickers that block the lid. Carefully remove them.
- Open the lid:
- Turn the lid counterclockwise to open it.
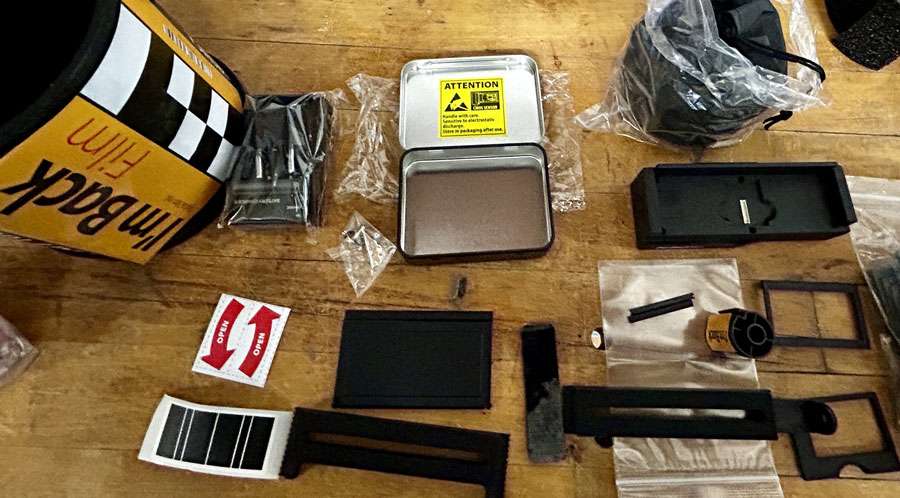
- Check the contents of the package:
- 1. I’m Back body with the adapter for 35mm cameras already installed.
- 2. Adapter for Leica M cameras.
- 3. Tin containing the sensor.
- 4. Battery charger.
- 5. Lens to reduce the image from 24x36mm to micro 4/3 and five adapter rings for different lens diameters.
- 6. Plastic bag containing stickers for attaching to the focusing screen or camera viewfinder (e.g., Leica M), two black plastic pieces to fit the sensor in cameras that don’t accept the film spool, and Velcro tape.
- 7. Removable black sticker to mark the center alignment of the sensor on the camera’s focal plane.
- 8. Cable with shutter button (OK button).
- 9. USB Type-C cable.
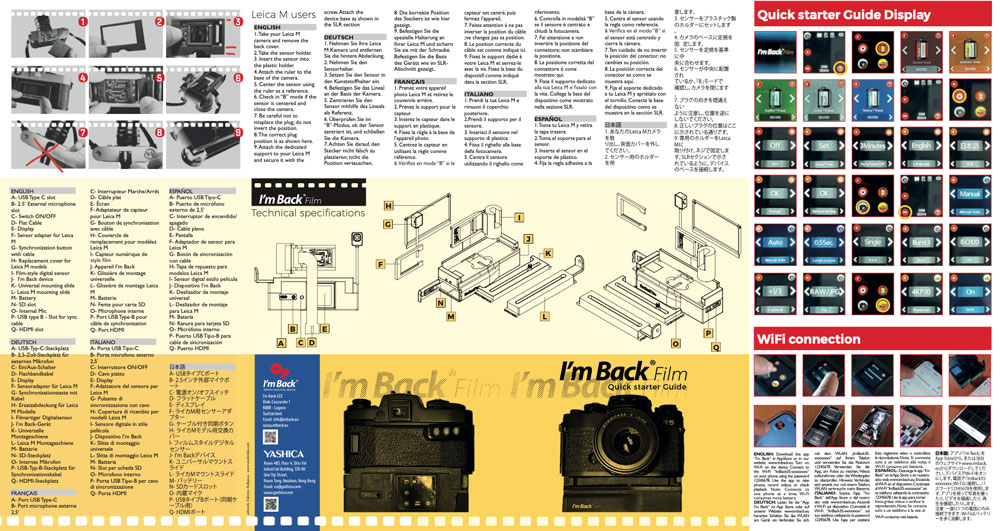
- 10. Quick Start Guide.
- 11. Additional back cover for Leica M.
Device Setup
Step 1: Prepare your analog camera
- Ensure the camera battery is charged.
- Open the back cover and remove the film pressure plate. Store it in a safe place if you wish to use analog film in the future.
Step 2: Set up the sensor
Important: Position the sensor correctly inside the exposure area, ensuring it does not press against the metal rails. When closing the back cover, do so gently to ensure the sensor isn’t being compressed by any part of the camera, as this could damage the glass on the sensor.
- Remove the protective film from the sensor only when fitting it into the camera.
- Attach the sensor to the plastic adapter, ensuring the protruding part is facing outward.
- Thread the flexible cable through the rear opening, folding it to the right.
Step 3: Place the sensor in the camera
- Insert the plastic spool with the adapter into the camera’s internal track.
- Use the provided stickers to align the sensor to the center of the focal plane.
- Close the back cover carefully to avoid excessive pressure on the sensor.
Important Note:
Some camera models do not allow the back cover to close due to their structure (e.g., Nikon F, Nikon S1, S2, S3, Contax II, and others). For these cases:
- We will provide a 3D design for download, allowing you to print an adapted back cover.
- Alternatively, you can position the sensor inside and use black American duct tape to seal the back. Unfortunately, this occurs with certain camera models, but for most cameras with classic back covers, this won’t be an issue.
Step 4: Assemble the reduction lens
- Attach the semi-transparent white frame to the camera’s focusing screen to adjust the capture area to the micro 4/3 format.
- Use the adapter rings if necessary to match your lens diameter.
Turning on the Device
- Connect the cable with the shutter button (OK button) to the indicated port on the device.
- Press the button to turn it on. The I’m Back logo will appear on the screen within a few seconds.
Taking Photos
Manual Mode:
- Adjust your analog camera as you would with traditional film:
- Select the shutter speed.
- Set the aperture.
- Focus on the desired subject.
- Press the device button and then shoot with the camera within 1 second.
- The image will be captured and displayed on the device screen.
- To view the photo, click the left arrow on the screen.
Automatic Mode:
- Press the device button to activate Live View mode.
- Adjust the framing directly on the device screen.
- Ensure the AUTO option is selected in the menu for automatic exposure settings.
Important Adjustments
ISO Settings:
- The device allows ISO adjustments between 100 and 1600, depending on the lighting conditions.
Exposure Compensation (EV):
- Use the menu to adjust EV by +2 or -2 to compensate for the extra light from the reduction lens.
Filters and Color Profiles:
- Experiment with available profiles, such as Kodachrome, Fujifilm, and Black & White, to create different styles.
Final Tips
- Always handle the sensor with care and avoid touching its surface directly.
- Refer to the manual for additional details about advanced functions and settings.
- Enjoy exploring the best of both analog and digital worlds with I’m Back!

